Getting Back Into the Swing of Things

Well the Sons of Sek got finished right under the wire. The GT was a blast and I'll have full coverage by this weekend. 

Saturday, June 14, 2008

Sons of Sek - Sentinels Conversion

My new Sons of Sek army has two sentinels in the list, mostly for their improved comms upgrade to help with the rest of my army deep striking in. Rather than use normal sentinels, I wanted to create something that would "count as" a sentinel. With so many rank and file models in my army, I wanted some things that could help make the army "pop" as a whole visually.

There's no mention of the Sons of Sek using sentinels in any of the Gaunt's Ghosts books, so I've taken some license in coming up with these converted penitent engines. The closest equivalent in the Ghosts books would be the wirewolves found in Traitor General. In the book they were metallic constructs that contained daemons, and they were used by the occupation force as a type of alarm system, guarding small towns.

What I've built are large metallic constructs that are, for all intents and purposes, controlled by a bound bloodletter. I've carried over the theme of the wirewolves, without necessarily carrying over their appearance.

Here's the conversion process:

Removing the Purity Seals
As you can see, there are a number of large purity seals covering the model. My initial thought was to remove only the wax portion, thereby converting the purity seals into "litanies of hate." I decided against this, and instead removed them all, first with clippers and then with a dremmel.

Chains Covering the Purity SealsDespite using a dremmel to remove the purity seals, the affected areas still looked fairly rough. I decided to use jewelry chain that I picked up at Michael's Hobby and Craft to cover all of the affected areas.

Chain Close-Up
I used Gel Superglue to form rivets at the point where the chain is attached to the body. It looks messier in this picture than it actually is. Oh, and this

Creating the "Pilot"
I opened up my new Daemons army box and reached for the bloodletters. I was really impressed how they managed to fit everything for all 10 models on 3 sprues. I would have to remove the sword (which I might give to my army general, if the size is not too much of an issue).

Changing the Posture
As you can see in the top picture, the natural position of a Bloodletter is hunched over with its arms angled inwards. The middle picture shows a normal penitent engine pilot with its back arched and its arms spread out. The new bloodletter models do allow for little if any articulation, unlike most other plastic kits. As such I had to trim areas, and cut angles from the arms, legs and pelvis.

Greenstuffing Gaps
Changing the posture of the bloodletters left large gaps in the pelvis and shoulders. I filled them with greenstuf and sculpted the musculature of the missing parts.

Constructing the Pilot Mounts
This part was most troubling. I had intended to carve out the original pilots from their mounting. There were two problems with this method: 1) The bloodletters were too big, and 2) it would have taken too much effort to effectively remove the pilot. Instead a decided to create a crude plsticard frame that would be camouflaged by other pieces.

"Plugging In" the Bloodletter
I took left over bass guitar strings from my Pleasurereaper Baneblade conversion and plugged them into the sides and the back of the neck of the bloodletters. I also took more of my jewelry chain and wrapped it around the torso and limbs to look like he's bound to the mount.

Cleaning up the Mounting Cables
I added some greenstuff to the areas where the cables plug in, to make a more gradual transition from cable to "flesh." I also added another set of chains around the wrists that attached directly to the Sentinel's arms.

Constructing the Banners
In order to further set these up as center pieces of the army I decided to add banners. I made these banners using essentially the same method I used on my Thousand Sons dreadnought. I began by drilling holes into the back of the sentinels at approximately 45 degree angles. I took brass rods to form the banner poles, and used dragon heads from the Chaos Vehicle Accessory Sprue and used them at the banner pole tops.

I then used then cut a piece of plasticard to fit within the available height of the poles, and wide enough at the longest point. I then cut the ends at angles parallel to the poles, but left the plasticard a little longer than necessary, so that I would have material to wrap around the back of the poles. I also cut various parts of the plasticard to make the banner look tattered.

Warping the Banners
I grabbed my heatgun and I just melted the plasticard around the poles and warped the banner itself. Once you heat an area, you have a few seconds to move and tweak it a bit. I just did this till I got an effect I was happy with.

Pilot Close-Up
Once everything started coming together, I realized that the bottom of the pilot mount was too exposed and looked crude. I went through my Chaos bitz box, and was surprised by what I found. I used the mount for a Havoc Missile Launcher from the Chaos Vehicle Accessory sprue. It's placed on its side with the flat end that's supposed to mount onto a vehicle out front. This provided a perfect spot to mount the Icon of Khorne also from the Chaos Vehicle Accessory Sprue.

"Sentinel" - Front
"Sentinel" - Right

"Sentinel" - Rear
"Sentinel" - Left

Overall, I'm quite pleased with how the two sentinels turned out. I will start painting them this weekend, though I have a lot of gaming planned. I'll probably wind up finishing painting them on Tuesday, which will put me 2 days behind schedule already. It took way longer to build these guys than I had expected. I'm currently in the process of priming them. The body and arms are not yet glued to the legs. I pinned them so I can paint the top and bottoms separately, and then I'll glue them at the end.

I think I spent about 16 hours total converting both. I think painting them both will only take 8-10 hours. Here's hoping.
Read more!

Wednesday, June 11, 2008

Strategies for Painting Armies

Inspiration for the Sons of Sek

Let's face it, there are quite a bit of unpainted armies out there. And some of these armies stay unpainted for quite some time. There could be a lot of reasons for this: slow painting ability, real life gets in the way, no incentive to paint, drastically prefers gaming to the modeling/painting aspect of the hobby.

I'm predominantly a tournament player. I am a TP for a couple of reasons: (1) I don't get to game that often, and playing in tournaments allows me to get 3 guaranteed games in a day; (2) I enjoy the competitive aspects of gaming; (3) I like that most tournaments focus on the hobby as a whole, which why I tend to disfavor the 'Ardboyz format.

I think that as a dedicated tournament player I have an incentive to paint (as well as the intrinsic incentive to see me complete a painted army), and I'm forced to place an equal value on painting as gaming (which I already intrinsically have). So for me those two reasons for not getting an army painted are dealt with. In many ways, these are the easier reasons to deal with. The other two reasons I gave are best dealt with a plan.

I lot of hobbyists don't have a plan for their army. They buy something here and there. They paint one figure from a squad, before moving on to half-painting a dreadnought, and then they decide to paint a figure from WHFB. Next thing you know, they've been playing with a partly primed, partly assembled, minimally painted army for months or years at a time. I'm no exception to this. I currently have a 'Nid army and a Skaven army that are in similar states. But I also 6 fully painted armies of substantial size between 40k and WHFB, that at one time or another have each won at least once a Best Painted award in a tournament (that doesn't include my Tau - but I don't like to talk about them).

Since I got back into the hobby 6 years ago, my Thousand Sons and Lizardmen were my first armies. With them I had no plan, and I spent a lot of time being distracted, and it took quite a while for me to place fully painted armies of them on the table. But since then I've made plans, and it has made me more efficient.

1. Set a goal. When do you want this army completed by? Is there an event coming up? Do you just want to set an arbitrary date?
What point value do you want to have done? Do you want just enough models for one list at that level, or do you want options?
To what degree do you want them painted? Minimum to be tournament legal? Enough to get a good painting score? Enough to give them a shot at winning best painted?

2. Plan your purchases. Ideally you'll be able to buy everything you need at once. This, obviously isn't always the case. When I used to work at Imperial Outpost, this was easier for me to do. Also if I got a bonus from work or just sold stuff on ebay, or whatever. But usually, most people can only buy a little at a time. If that's the case, know exactly what you have to purchase for your army, and stay committed to a purchasing plan. Don't get distracted by new stuff for another army. Stick to the plan!

3. Create a Schedule. This needs to be realistic.
3a. Figure out how much time you can devote to building/painting on an average week.
3b. For every unit in your army, estimate how long it would take to paint them (this is easier with the more experience you have). For example, I know that when I'm batch painting I can paint one 40k infantry mini in an hour. So a squad would take me 8-10 hours depending on the size. Even if your estimates are off, this is creating a framework that will help you spread out your workload.
3c. Compare the total estimate of hours to complete the army to the total time you can give per week over the length of the project. Adjust your completion date if necessary. Alternatively, if you can't adjust the completion date, can you increase the amount of time you spend per week? If this still isn't enough, are you willing to sacrifice quality? If you're not, then you may need to make the hard decision that the project just can't be done on time.
3d. Assuming you've adjusted your schedule as needed, do your best to stick to the schedule. I often over estimate my figures to give me some leeway.

4. Use an assembly line method. If you build and paint one model at a time you will have a better over all product. In the case of small, elite armies, this method is ideal (see Ron Saikowski's Emperor's Children). However, I prefer to use an assembly line or batch building/painting method. This enables one to paint more things more quickly, and if it is done right without much loss in quality. This is ideal for a bunch of rank and file models.

This can be done in one of two ways: 1) by squad/unit, or 2) by like models. Some people will do an entire squad including special weapons and sergeants. Usually this approach is fine. However if you're doing a horde army, or just an army with a higher than average model count, consider building and painting like models at a time. Paint all of your plasma gunners together. Paint all of your Sergeants together. This is best accomplished if you have the entire army purchased before you start.

If you use this method, know how many models you can get painted in one or two sessions. I usually try not to paint more than 8 models at a time. Also, keeping a simple pallet is helpful.

5. Keep things interesting. It can be hard sticking to a schedule. Sometime you just have to push on, sometimes you need to take a break, and other times just switching things up can make a difference.

If you want to get started playing right away, then by all means build the army first and get some games in. However, sometimes building and converting models might be a nice change of pace from painting models.

Also if you've been painting nothing but grunts for a while, switch things up and paint a character or a vehicle.

Stay entertained while you paint. Listen to music or watch movies. Also paint with other people at the local shop, or have a painting party at your place. Time is your biggest enemy, boredom is the second biggest.


The Plan in Action
1. Set a goal.
I want to take my Sons of Sek traitor guard army to the Vegas GT on September 6th. Including this week that gives me 13 weeks to paint 179 models. Each model will be heavily converted, and the plan is to paint them to a level that will earn them a high painting score. I'm prepared to cut corners on some of the rank and file guys, and spend extra time on some center pieces.

2. Plan your Purchases
I knew that I would not be working on this army until the summer, but I started making my purchases for the army back in the winter. I'd by a box of Cadians here and there. So now that I'm ready to start, I have everything I need, including material for conversions.

3. Create a Schedule
3a. I'm planning on devoting about 20 hours a week to building and painting this army. I'm in a fortunate position to do this, since I don't have classes, and the only work I'm doing is a 20 hour a week internship.
3b. I have the following models to build and paint:
1x Heroic Senior Officer - 5 hours
3x Lieutenants - 12 hours
12x Body Guards - 15 hours
4x Standard Bearers - 16 hours
3x Veteran Sgt's - 4 hours
6x Veteran Melta Gunners - 8 hours
1x Veteran Plasma Gunner - 2 hours
2x Veteran Flamers - 3 hours
3x Veterans - 4 hours
2x Demo Charges - 2 hours
4x Flamers - 4 hours
12x Sgt's - 16 hours
3x Melta Guners - 3 hours
9x Plasma Gunners - 9 hours
12x Vox Carriers - 12 hours
90x Joe Schmo Guardsmen - 90 hours
2x Sentinels - 16 hours
TOTAL - 221 Hours
3c. I've estimated that I can spend 20 hours over 13 weeks, which gives me a total time available of 260 hours. That should be well enough time to get this project finished. It also gives me some leeway in my schedule, and allows for errors in estimating. So next I'll schedule out the weeks, trying to stay as close to 20 hours worth of work a week (I'll front load my schedule).

Week 1: Sentinels
Week 2: Veterans
Week 3: Vox Carriers, 8x Joe Schmo Guardsmen
Week 4: Standard Bearers
Week 5: 16x Joe Schmo Guardsmen
Week 6: Officers
Week 7: 24x Joe Schmo Guardsmen
Week 8: Body Guard, Flamers
Week 9: 24x Joe Schmo Guardsmen
Week 10: Sgt.'s
Week 11: 18x Joe Schmo Guardsmen
Week 12: Melta, Plasma, Demo Guardsmen
Week 13: Leeway week, or build display board

Steps 4 and 5 will be documented here on the blog.

That's quite a tall order. It's definitely doable, but will take a lot of effort.

There's nothing like seeing two fully painted armies battling it out on the table top. Sometimes you can't avoid playing with unpainted armies (you might be playtesting, or you need to get some practice games under your belt while you paint the army). But it'd be great to see more games with painted armies, and sometimes direction and planning are what's needed to accomplish that. Let's see if I can follow my own advice this summer.
Read more!

Monday, June 9, 2008

Uruk-Hai Project Almost Done


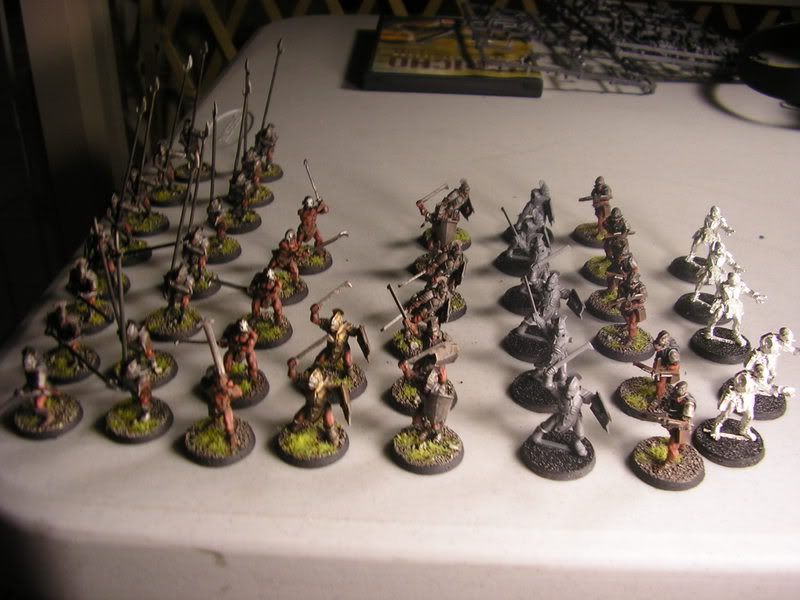
Well, this project is nearing completion; above is a shot of all the models in the army. I've put in a lot of time since I started this last Wednesday (06/04), and I'm pretty sick and tired of Uruk-Hai. But I can see the light at the end of the tunnel. Tomorrow I have 6 more Uruk swordsmen planned, and then all that will be left are the five extra crossbow Uruks, once Anthony gets the missing pieces to me.

I've been at home painting furiously painitng. What have I been doing while painting? Well, watching a lot of television and DVD's. Here's what's been keeping me entertained.

  • Jericho (Season 1) - I just finished all 22 episodes yesterday, and I loved it. I can't wait to get my Season 2 DVD's in the mail
  • Freaks and Geeks - I'd been planning to watch this for some time, I highly recommend this critically acclaimed show
  • The Classic Romero Trilogy: Night of the Living Dead, Dawn of the Dead, Day of the Dead - I had never seen any of these originals. I was very impressed with the first two, Day was a disappointment
  • Dawn of the Dead (2007) - This was probably my 4th time watching this, what a great flick. I also re-watched all of the special features. There's a great news broadcast extra where the late Richard Biggs (Dr. Franklin from Babylon 5) is the anchor, and Bruce Boxleitner provides the voice of the President.
  • American Me - Great movie, directed by and starring Edward James Olmos (Admiral Adama from the new Battlestar Galactica). Really good movie about gangs in East L.A.
  • My Family, Mi Familia - This was also really good with Jimmy Smits and Edward James Olmos. It follows three generations of a Mexican-American family in East L.A. It reminded me a lot of stories of my family on my father's side.
  • 8 Films to Die For: Mulberry St. - This was one of the yearly Horrorfest Selections. It includes both Rat Zombies and Zombie Rats... yes, there is a distinction. In some ways I was really impressed. There was a lot of character development and it was very well presented. The movie fell apart when the Zombies showed up - not a good sign for a zombie movie.
  • 8 Films to Die For: The Deaths of Ian Stone - This was a great movie, I liked it a lot. It was kind of like a horror version of Quantum Leap. Well done, with great special effects.
  • This weeks episode of Battlestar Galactica - I watched this twice already (in fact I've watched every episode of the season at least twice so far). It's some of the best sci-fi on television ever, and it's one of the best dramas on television... period. This was a great episode. I'm both excited and sad for the ending. 11 episodes to go!
  • Today's Meet the Press - God, I love politics. This show comes on so ungodly early on Sunday's, good thing for Tivo. Great roundtable today discussing the wrap-up of the democratic campaign, and the outlook for the general election. It looks like this year is an open field, unlike the last 2 presidential elections, where it basically came down to one state.
I'm actually looking forward to going to my internship tomorrow, just to get out of the house.

I'll probably post some thoughts later this week on army painting - how to plan, how to stay motivated and stick the plan, and how to get the army finished. That's all for now.
Read more!

Friday, June 6, 2008

New Project: The Fighting Uruk-Hai


With my Easterlings temporarily on hold until I get the models I need, I've started working on a commission of Uruk-Hai for Anthony. Originally, the plan was to be done with the Uruk-Hai by the beginning of June, but life happens. Slated for the painting board is the following:

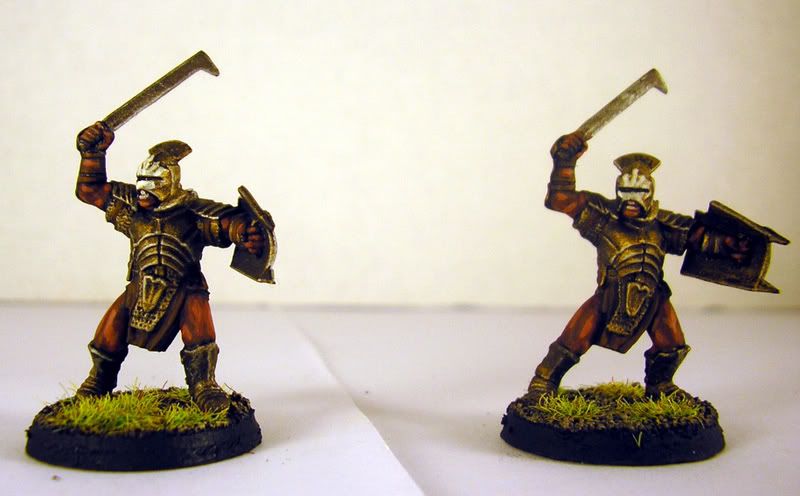
2 Uruk-Hai Captains
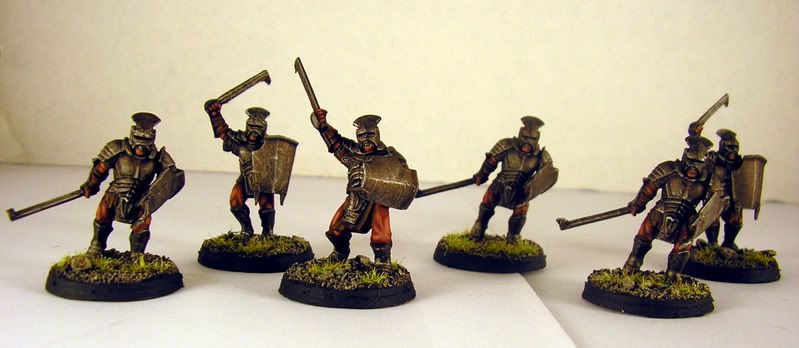
14 Uruk-Hai w/ Sword and Shield
16 Uruk-Hai w/ Pikes
11 Uruk-Hai w/ Crossbows
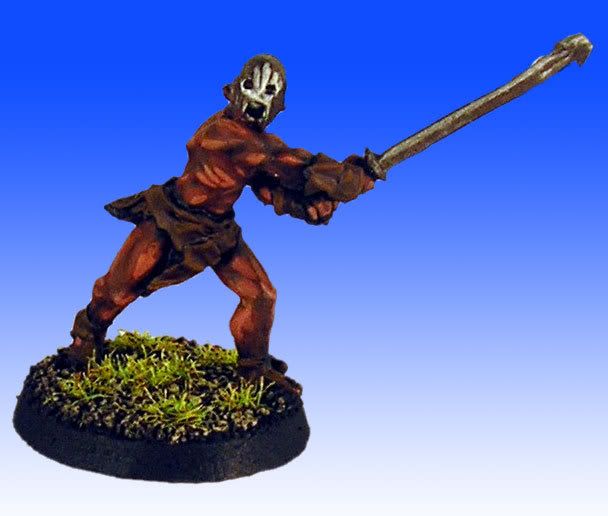
5 Uruk-Hai Berzerkers

Over the last two nights I finished the Captains, the Berzerkers and 7 of the Sword/Shield Uruks. All of them are done using the same basic steps.

Armor / Weapons / Shields:
Over a black base coat
Tin Bitz (Drybrush)
Boltgun (Drybrush - light coverage, except on the edges)
Mithril (Drybrush - edges only)

Flesh:
Dark Flesh
1:1 Dark Flesh:Tanned Flesh
Tanned Flesh

Loincloth / Straps:
Scorched Brown
Bestial Brown

Misc:
Teeth - Rotting Flesh
Painted "Hands" - Wattered down Skull White
Hair - Chaos Black; 1:1 Black:Codex Grey; Codex Grey

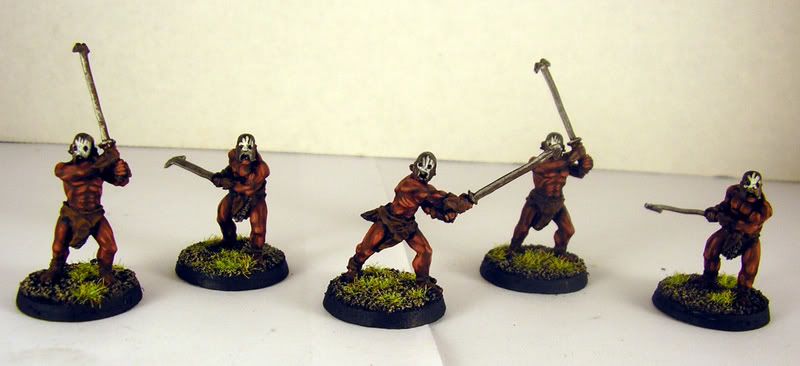
Uruks with Sword and Shield

Uruk Captains

These were done a little differently from the other Uruks. To denote that these two are Captains, I used Shining Gold on the armor at the step I would normally have used Boltgun. These are also the only non-Berzerkers to have the White Hand of Saruman painted on their helmets.

Berzerkers

Tomorrow, I'll get to work on 6 of the Crossbowmen (I'm currently missing arms for 5 of them). The plan is to have everything done (minus the 5 crossbowmen) by day's end Monday.
Read more!

Wednesday, June 4, 2008

Easterling Project Finished... Sort of


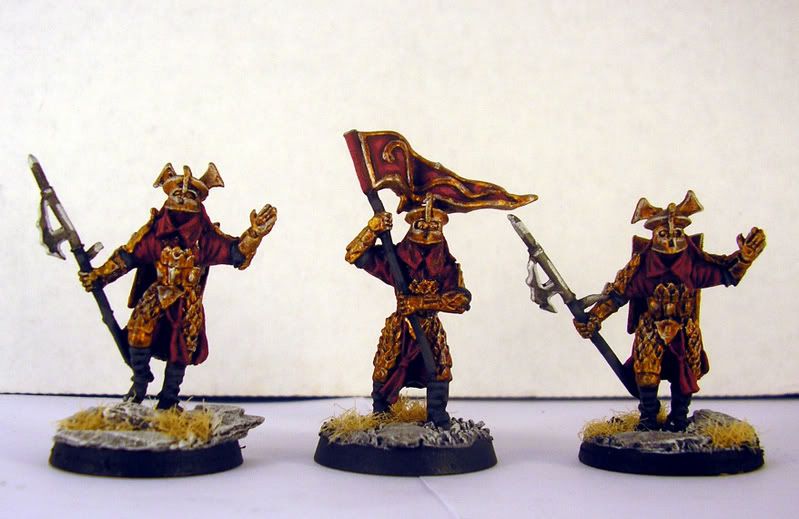
In the last week, I finished painting all of the Easterlings that I need among those models I already own. This includes 5 more archers, 5 Kataphrakts, 1 Standard Bearer, 2 Captains on foot and 1 Captain on Horse.


I didn't take pictures of the archers, since they're more of the same as the others I did before.

So what I have painted is:
16 Swordsmen
11 Archers
8 Spearmen
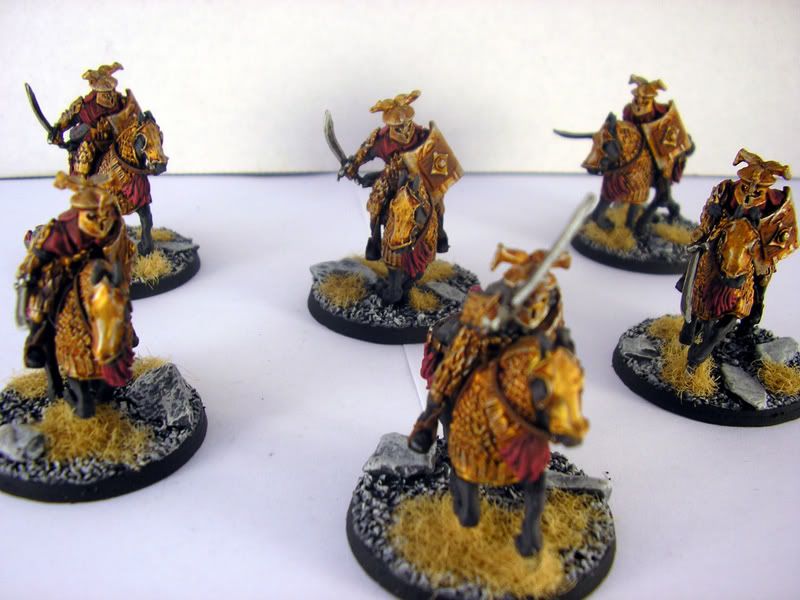
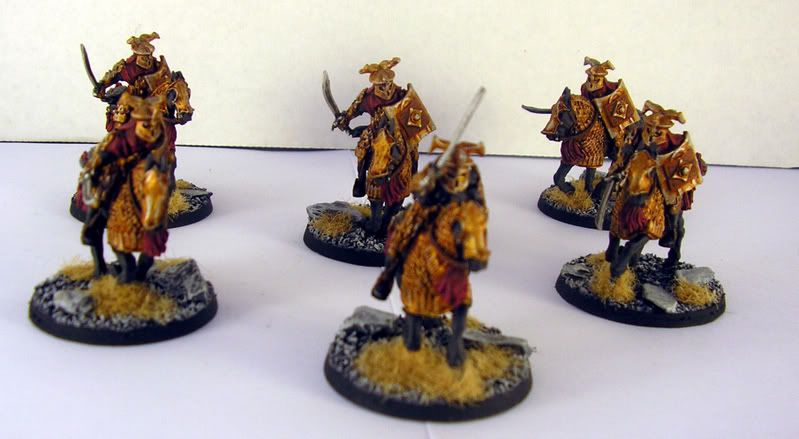
5 Kataphrakts
2 Captains on Foot
1 Captain on Armored Horse
1 Standard Bearer

I still need to paint a Captain on foot to represent my mounted captain in case his horse gets shot, another 4 swordsmen or so for dismounted Kataphrakts and another 5 Kataphrakts.

Unfortunately, I had some problems getting the models I needed from my shop down here in Tucson, so I'm hoping to get them from Imperial Outpost, brought to me by Anthony when he comes down.

So for now, I'm moving on. Next up are Anthony's Uruk-hai. I'm currently 9 days behind schedule in my summer painting plan, I hope to make up two of those days this week, we'll see.
Read more!

Current Progress on the Sons of Sek

Current Progress on the Sons of Sek
Sept. 5th, 2008 - They were finished literally at the table before the first round began.