Getting Back Into the Swing of Things
Well the Sons of Sek got finished right under the wire. The GT was a blast and I'll have full coverage by this weekend.

One fateful day, about two years ago, I picked up the recent copy of White Dwarf. In that issue was an article about creating Chaos World tables and terrain. The Tzeentch table used wallpaper to cover the table instead of grass or sand. It looked like a cracked surface with blue warp energy emerging from below. I was sold. Having previously decided to do all four cults (Thousand Sons, World Eaters, Death Guard and Emperor's Children) along with the Black legion, I decided that I would use this wallpaper on all of my Chaos bases.
This has been a blessing and a curse. It's a blessing because it keeps me from having to apply sand and static grass to my bases. It also creates a very effective yet easy look, that stands out from a lot of conventional bases.
It's a curse because it provides a weak joint between the model and the bases (the paper just rips sometimes) and because painting in the highlights on the warp energy take longer than merely doing a fast drybrush on a textured base.
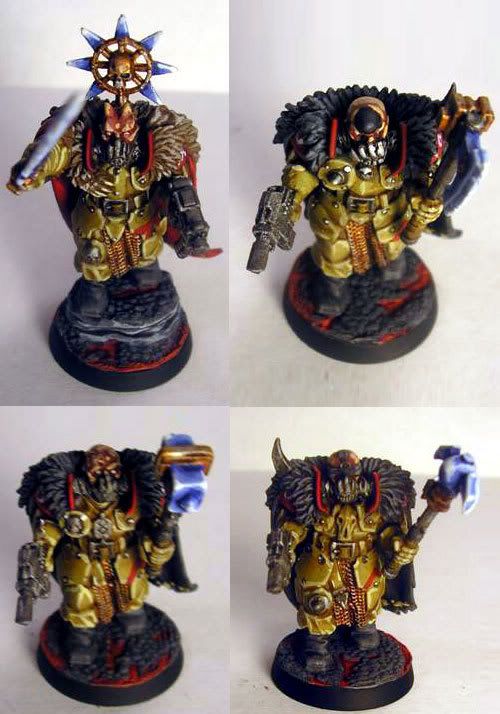
But I made the decision, and overall I'm happy with it. I usually get a lot of compliments on the bases, and always seem to shock people when I tell them that it's just wallpaper. As you can see in the above picture, it works for all the different flavors of chaos. I've also used mixed armys (most notable some EC and BL), and there is enough consistency in the style and the rocky surface that the different colors of warp energy don't seem to clash.
The other day someone I met at Hat's Games wanted to do the bases for his Eldar. I had previously shown him some of the other examples on the blog. He came here for a tutorial on how to do it, and low and behold, there was none. Ironically, it was one of the first tutorials I had planned on doing when I first started I just never got around to it (in fact I mentioned wanting to to the tutorial back on April 9, 2008 in the post about my Death Guard).
So here it is... how to do Chaos bases, RFTL style.
Preparation
 I usually start by grabbing a bunch of bases at once. I then rip off a large section of the wallpaper. I'm not concerned about conserving it, because I haven't even come close to making a dent in it after some 300+ bases plus a large display board.
Applying Superglue
 Kind of hard to tell from this picture, but you just want a bit of superglue in the center of the base. I tried different methods, most notable where I would even spread a very thin layer of glue over the surface of the base. But now I just put it in the center. It takes a little to figure out the right amount. Not the end of the world if you use to much, but don't let it happen too often.
Gluing the Bases to the Wallpaper
 You then place the wallpaper upside down and press the base down firmly. Check to see how much glue seeps out the sides. If there's a lot then you're applying too much (makes it difficult to cut the paper). Ideally you want to see just a little bit of moisture at the edges. If there's not enough then the edges will stick up, which you have to go back and glue later.
Cutting the Bases

 After they've had 10-15 minutes to dry I start by cutting them in separate, manageable pieces using a scissor. Next I cut them out, trying to get the edge of the wallpaper as flush to the edge of the base as possible. I used to use an exacto, but have been happier with a pair of sharp scissors with a thin blade.
Once they're done, you just glue the model to the paper and prime it up. For metal models with a slot base you have 2 options:
Option 1: Put the model in the slot before the wallpaper. Then cut a piece of wallpaper so that there is a hole for models feet and a center cut so it comes together like to halves. This is a lot of work.
Option 2: Cut off the slot, and pin the model to the base after the wallpaper has been applied. I think this turns out to be easier, especially if you have a dremel.
Painting the Rocks
 Step 1: Over a black base do a heavy drybrush of German Grey (GG is a vallejo paint, I highly reccommend getting it and the other Vallejo colors I reccommend here - alternatively mix 1:1 - Chaos Black:Codex Grey).
Step 2: Drybrush Dark Grey (Codex Grey)
Step 3: Finally do a light drybrush of Neutral Grey (Fortress Grey)
Painting the Warp Energy
 Well this is up to you, depending on what effect you want. For the Sons of Sek, they have red bases because the worship Khorne (blood for the blood god, and whatnot).
The contrast between the colors looks better in person than in these pics, but I think you get the idea. So for Khorne bases I do the following:
Step 1: Mechrite Red
Step 2: Highlight of Blood Red
Step 3: Finer Highlight of 1:1 - Blood Red:Blazing Orange
Step 4: For those bases with a larger area of energy I'll do a final thin line of Blazing Orange
Really you could do just about whatever. The guy I mentioned earlier from Hat's Games, want to do them as water. I never thought of that, great idea. I reccommended that after he sealed the model to use gloss varnish on the water channels. Looking forward to seeing them finished. Maybe in the future I'll have to steal the idea from him, that he stole from me, that I stole from White Dwarf (somehow that reminds me of Krusty the Clown).
Well, that's it for now. 21 Sons of Sek to go, plus the display board. I'm trying to take pictures as I go along, but its hard when I'm trying to hurry everything.
Read more!

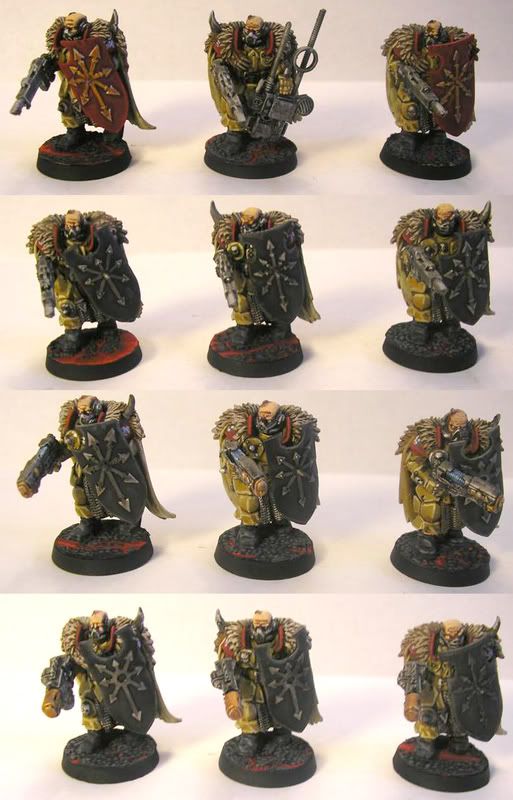
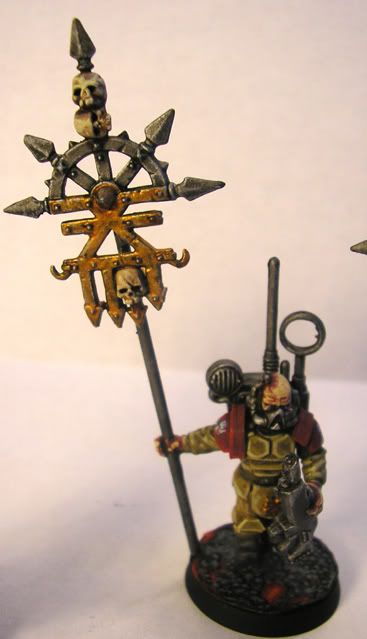
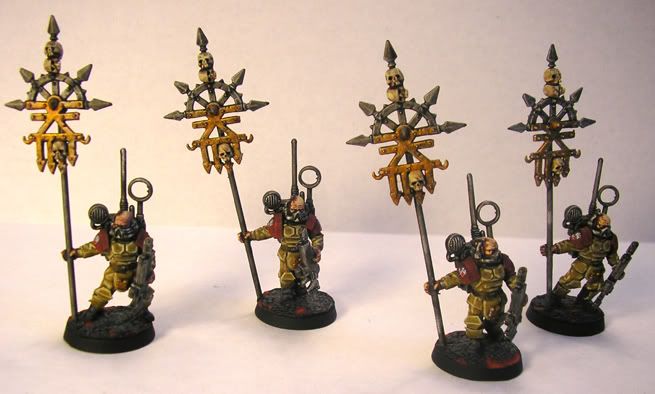
Here are the extra bodyguard for my 4 command squads. These guys have been done for a while, just haven't put them up yet.
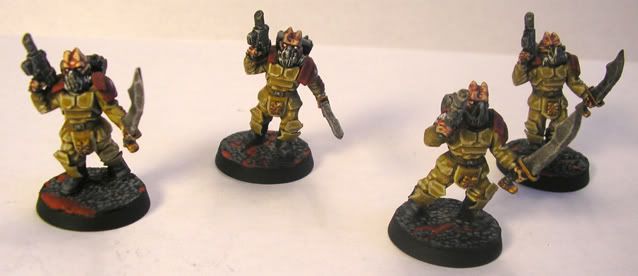
The standard bearers and the officers complete the command squads. I decided that it would make sense to give the bodyguard shields, which has no in-game benefit. But I think it really makes them stick out from the veterans (Part I | Part II), who are also based off the chaos warrior models.
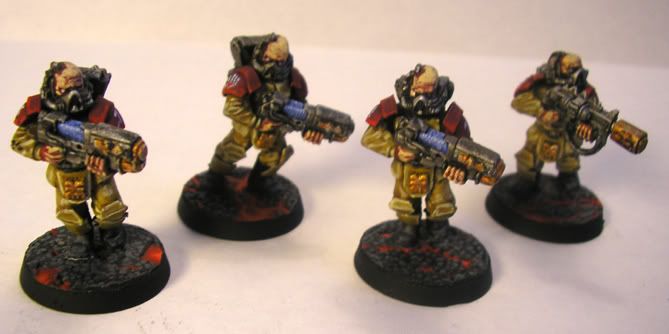
The top squad is given red shields, which matches the red cape worn by the Heroic Senior Officer (Chief Sirdar Seram). The squad also contains a master vox. In order for it to be positioned that way, I had to cut off all of the speakers and aerials, and turn them around. I also added some guitar cabling to make a longer aerial, signifying that it is the "master" vox. The bodyguard are armed with lasguns.
The other squads have black shields which match the capes of the other officers. One of the squads is armed with lasguns (they're designed to be back up leadership support, and also possibly grab an objective in my backfield). The other 2 squads have meltas and plasmas. This was a late change in the list, I decided I wanted some more firepower, and took these extra special weapons at the expense of the Sharpshooters Doctrine on the infantry squads.


Read more!

Last night I finished the final 6 body guard for my command squads, which leaves only 80 models of 2nd and 3rd platoon left. Later this week I'll post pics of the body guard.
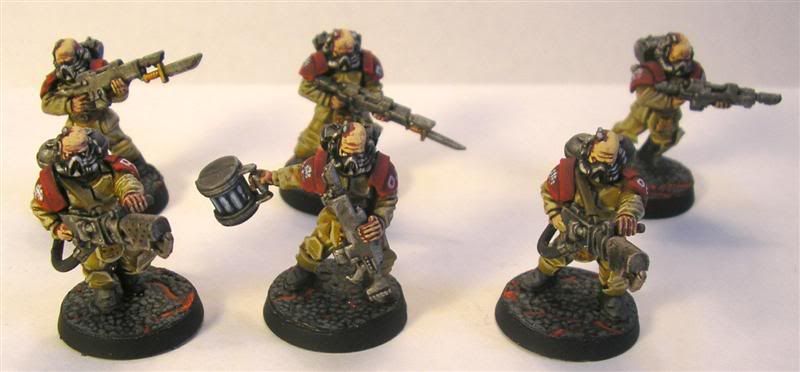
Here's one of the two special weapons squads:
 They're armed with 2x Flamers and 1x Demo charge.
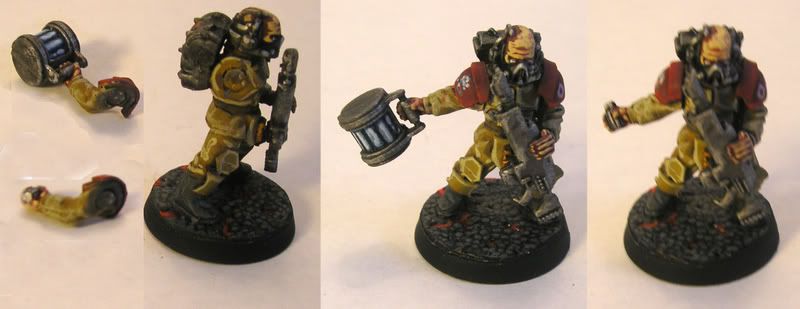
The Demo Charge was made from some pieces from the IG Heavy Weapon sprue (I think they belong to the auto cannon). Each half normally glues on either side of the weapon. I made some key cuts and made them sit flush to each other. I then took an arm that was throwing a grenade. I cut out the grenade and put the handle in.
The rules for the demo charge require you to substitute the model for a normal lasgunner after he throws the demo charge. Not wanting to paint another model, I decided to instead paint an extra arm and magnetize them all:

So far in the 2 games I've played with the demo charges they've missed completely. Oh well.
I also sent away for my T-Shirt for tournament. Thanks all who voted. I actually liked the brown myself, and so did one other person. But the maroon is on the way. Here's a pic of the final design:
 Read more!

1st Platoon (4 infantry squads and 1 command squad) are almost finished altogether. Last Friday I finished the Vox Operators, Weapons Specialists and squad Sergeants.
Vox Operators

Weapons Specialists

Sergeants

Late last night I finished another 9 lasgunners, and I'm working on 9 more today. Once they're done, all of 1st Platoon's infantry squads will be done.
I took 500 points with me to Hat's Games this last Saturday for "Learn to Play 5th." I got in 5 games against three CSM's, Eldar, and Tau. I very handily won the 4 non-annihilation games. The one annihilation game I played was against a Thousand sons army with two KP's against my 7 KP's. I would have wiped him off the board, but as soon as he got the 3rd kill point, it was moot. Oh well.
Ok, back to work. I can feel a "wall" coming up. I've got to power through!
Read more!

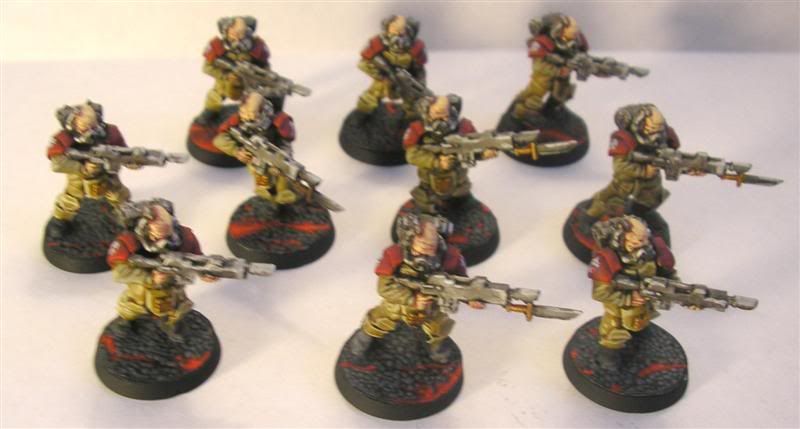
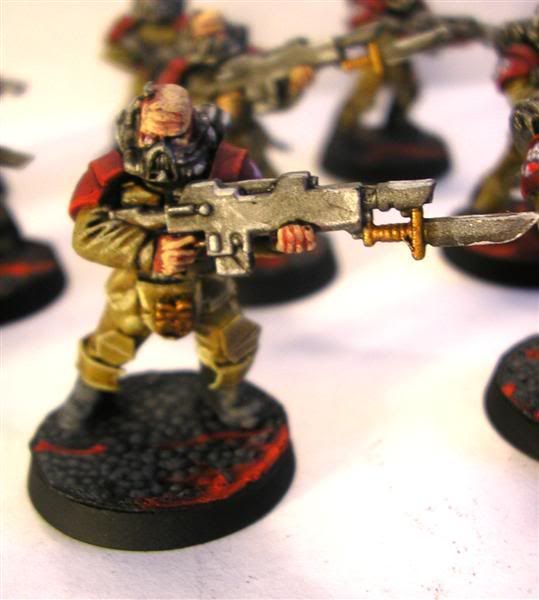
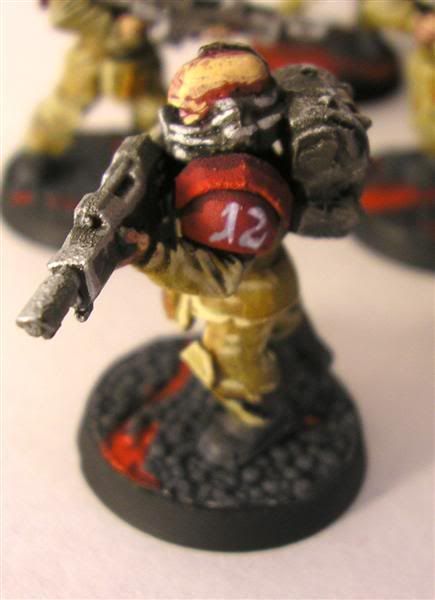
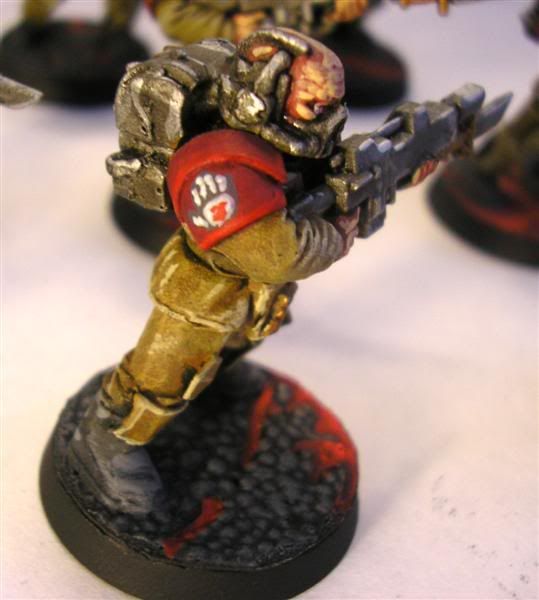
Here's 10 basic joe infantry squads. They're all members of 1st Platoon. Seven of them are from Squad 11 and three of them are from Squad 12. Same basic methods that I used to paint the rest of the infantry (see
Painted Veterans). What was a nice surprise, was that these guys only took about 45 minutes each, compared to the 75 minutes to do a veteran. I figured that with build time and paint time, I have 160 hours worth of work left to do. Or about 5 hours a day (yikes) for the next 5 weeks (week 6 will hopefully be building a display board).
I think, unquestionably, the heads are big. But painted up, I don't think they look too bad. Umm, so they come from a planet that creates big heads as a mutation. Yeah, that's the ticket... just the other day. Seriously, I don't think it's too distracting.

At my local game store (Hat's Games down here in Tucson), they're doing "Learn to Play 40k" Saturday's, where we'll be doing escalating points to get a handle on 5th edition. To be honest, I'd rather just jump in at the higher points levels, but it's giving me little painting goals along the way.

For instance, this Saturday is 500 points, minimum of 1 troop squad. For me that would be 1st Platoon and a Sentinel. So... I'm going to try to get 1st Platoon painted before Saturday. That leaves me with 4 Vox Casters, 4 Sgt.'s, 4 Special Weapons, 3 Bodyguards, and 18 regular guardsmen.

Last night after I finished painting these guys, I put together the Vox-Casters. Today hopefully I can put together the Sgt.'s and the Special Weapons and get a jump on painting them. Unfortunately I still have to finish a final assignment for my internship. Tomorrow's my last day, then I can really dive in.
10 more down, 134 to go.
Read more!

It's been more than a week since my last post. Things have been a little crazy around here, and I'm behind on my schedule. I'll get it all figured out, and I might be able to get caught up or at least nearly caught up next week.But anyways, let's talk about my officers. So I needed my HQ (a Heroic Senior Officer) and 3 Junior Officers to lead my 3 Infantry Platoons. They would also use the Chaos warrior bodies as the basis of the conversion.
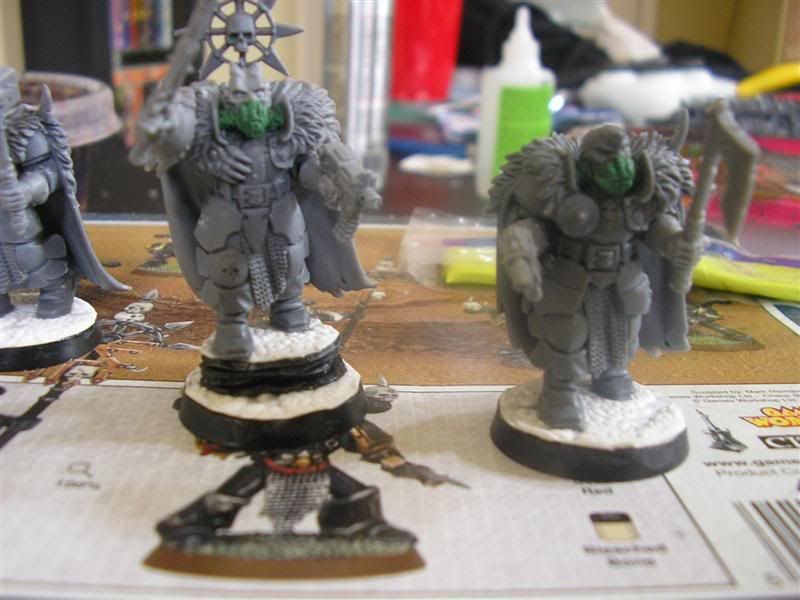
I wanted to make all of the officers stand out from the rest of the Chaos Warrior body models. The first thing I did was for the HSO. I decided I wanted him a little higher on a rocky level. I needed something flat, that I could glue the wallpaper I use on top of.
Making the HSO Stand Out


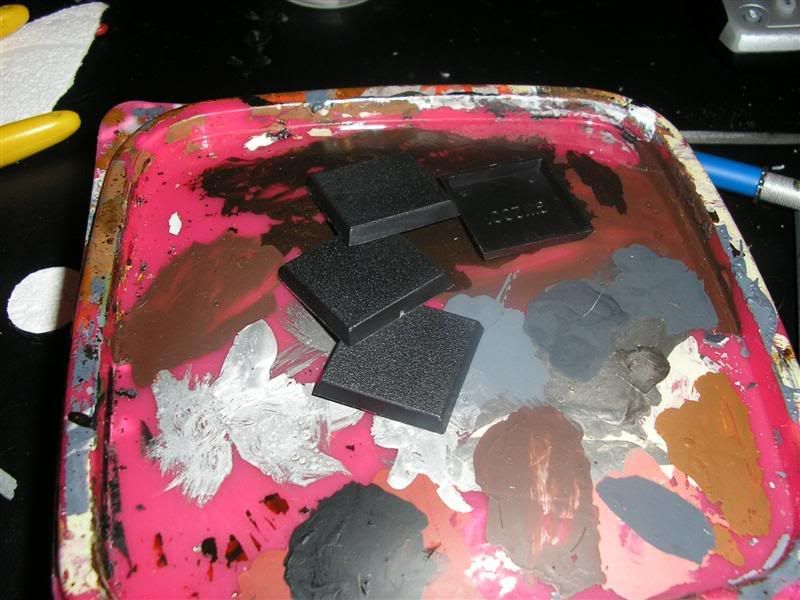
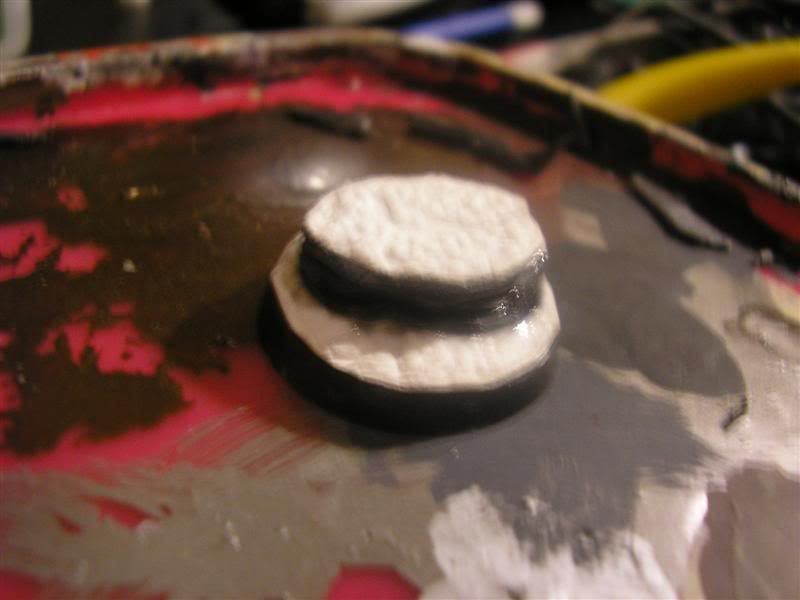
I grabbed some square bases and cut off the beveled edges. The plan was to form these up a bit and glue them together, to create my rocky raised platform.
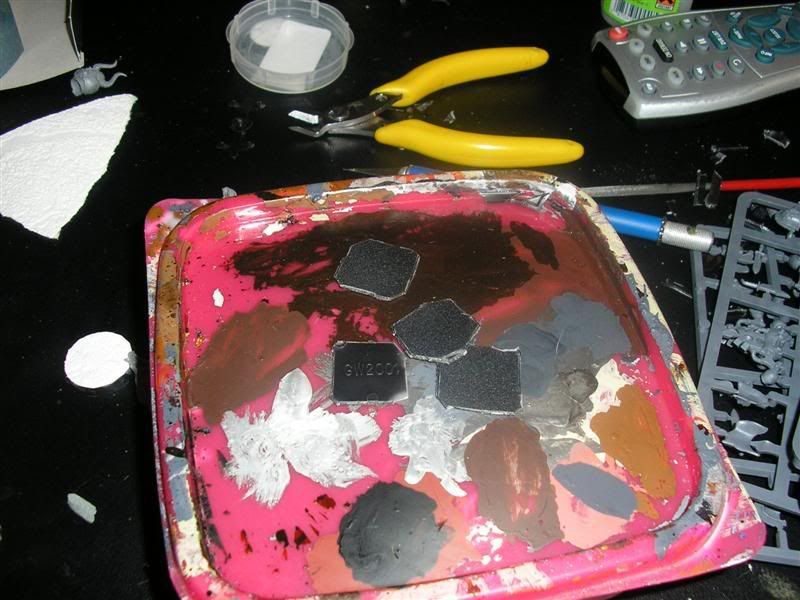
 I then carved them into more natural shapes within a certain range of each other. I also beveled their edges.
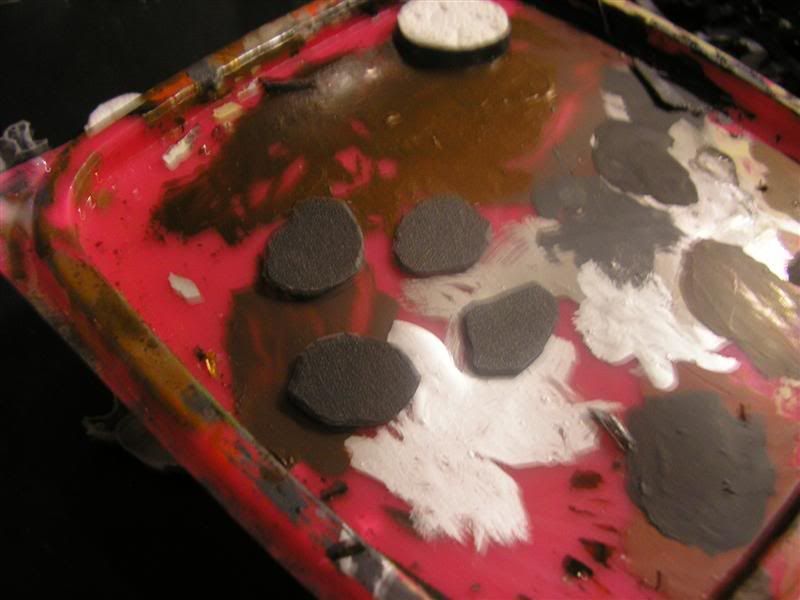
 Gluing them together and putting the wallpaper on, I wound up with the above. It doesn't stand out too much now, but is more noticeable painted up.
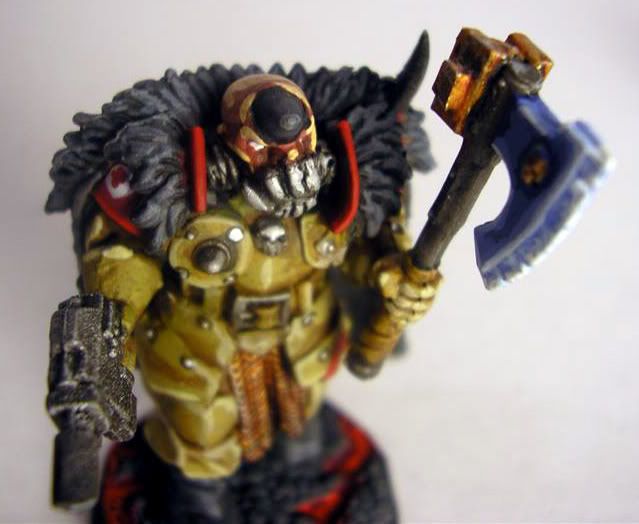
All of the officers have mutated heads from the Chaos accessory sprues. I also gave them each the hand respirator mask. The HSO also has the Chaos star on his back, which will represent his refractor field. The HSO also has a bolt pistol, while the JO's have las pistols which are converted lasguns.


I figured that their power weapons would also make them stand out. But half way through painting the models, I realized that the JO's weapons didn't quite look sci-fi-ish enough. So I added some plasticard and guitar wire make them look like there was some sort of power pack attached.


Here are the finished products:
Chief Sirdar (Colonel) Sheram
Vice Sirdar (Lieutenant) Katesh

 All of the JO's I decided should have a different colored cape, and so I settled on black. I gave them the same chaos script along the bottom of the cape that the HSO has.
Vice Sirdar - Winscar

Vice Sirdar Maggol


So there they are. I should note, that the hard line highlights on some of the models aren't nearly as drastic in person, they're much more subdued. Oh well. Off to finish modeling some joe schmo guardsmen.
Read more!

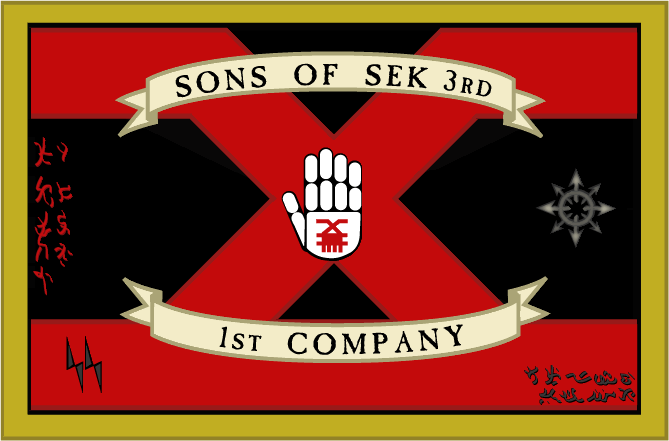
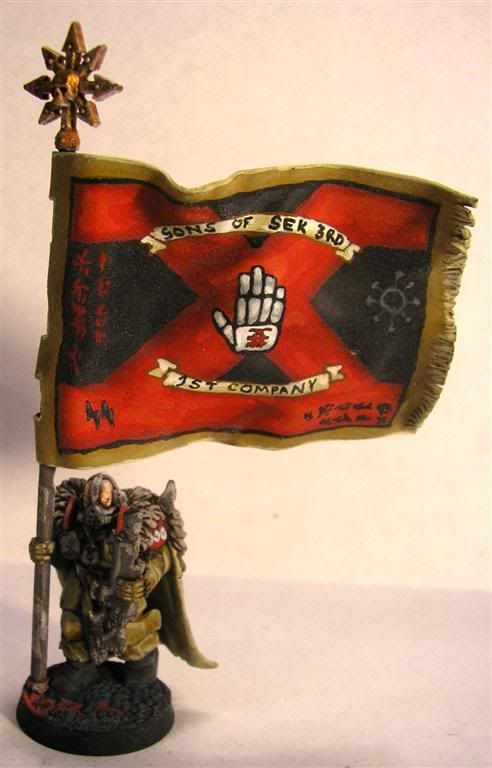
In order to break up the monotony of the painting and also the overall appearance of 167 infantry, I would want several banners in the army. I decided that I wanted a company banner and a banner for each infantry platoon.
I decided early on that my army would be the 1st Company of the Sons of Sek 3rd Regiment ("The Magister's Fist"). So above is there Company banner, which says just that. As the 1st Company, their role is often as a spearhead or assault element (hence the "drop trooper" doctrine). The little stylized lightning bolts in the lower left corner represent that.
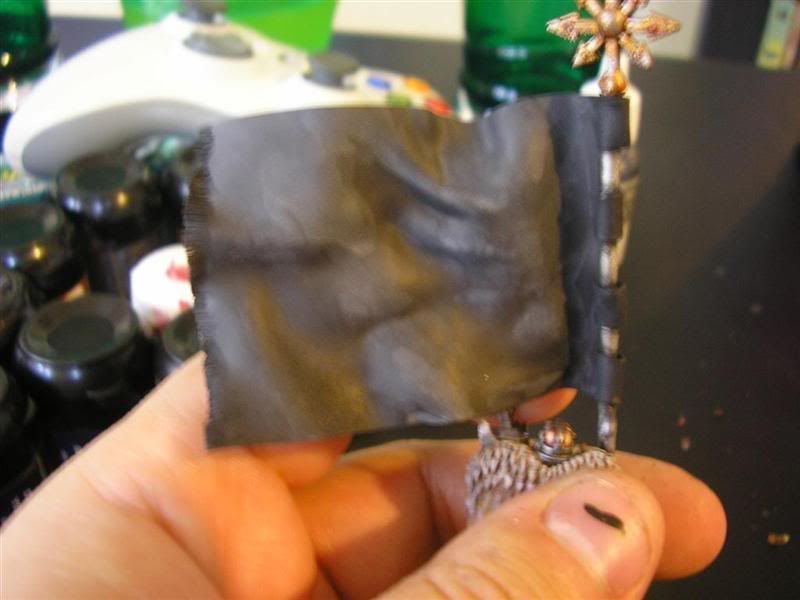
It was made from 2 Chaos Warrior banner poles. I cut part of one in half and glued it on to an intact one to add a little length. The flag itself is plasticard warped with a heat gun.
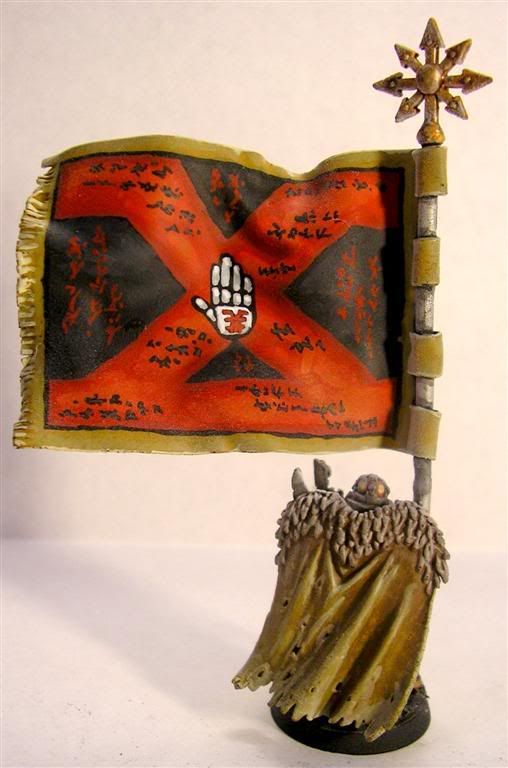
Back of Company Banner

A lot of the inspiration for this banner came from Ursarker Creed's banner. I wanted the front to be a little cleaner and less "chaotic" than an average Chaos banner, in order to reflect the drilled and disciplined nature of the Sons of Sek. I think the back of the banner makes up a little for the "chaotic" look with the script.
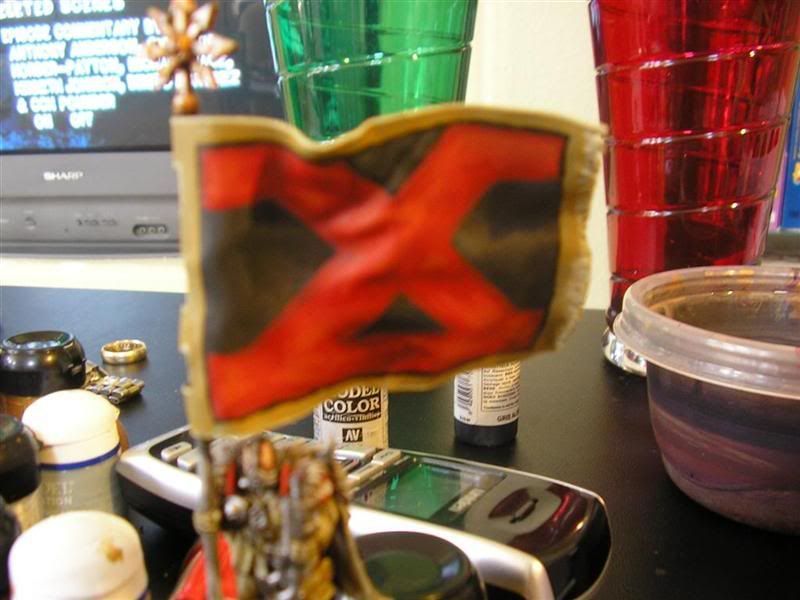
I knew I wanted to incorporate some kind of cross or St. Andrew's Cross into the design. I sketched and doodles for a while and came up with the top half of the Khorne symbol.
Picking the Colors
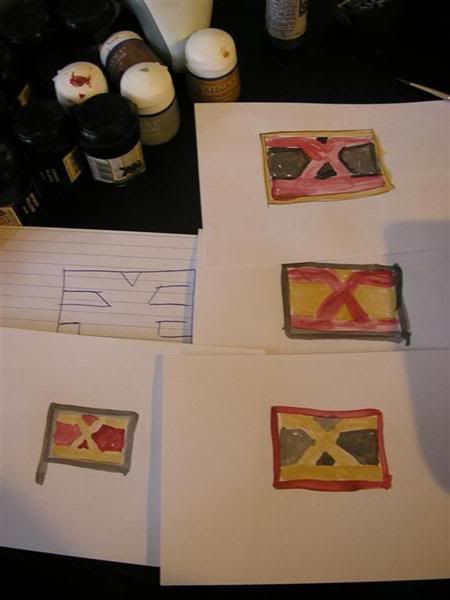
 I knew it was going to be Black, Red and Ochre, I just couldn't decide on how those colors would be combined, so I made some quick flags using my paints on index cards. I never toyed with the idea of the "Khornate Cross" being black, only red or ocher. After seeing my examples I decided that the Khornate Cross should probably be red, and then eventually decided on the ochre border.
Background
 Since the background would be black I began painting the entire banner black, working up progressive highlights of Vallejo German Grey, Dark Grey and Neutral Grey. Then I gave it a Chaos Black wash to smooth the transitions and take out some of the brightness.
Khornate Cross
 Originally the cross was painted all the way to the edges using Mechrite. The top bars were originally solid, then I cut in with the black. I then added a black border, so there would be a black line between the red and the ocher border.
 I then added the ocher border and highlighted up the red and ocher using my normal progressions. All of the symbols and writing were then painted on. I got a little eager in my painting, that I forgot to take pictures to document the progress.
Platoon Banners
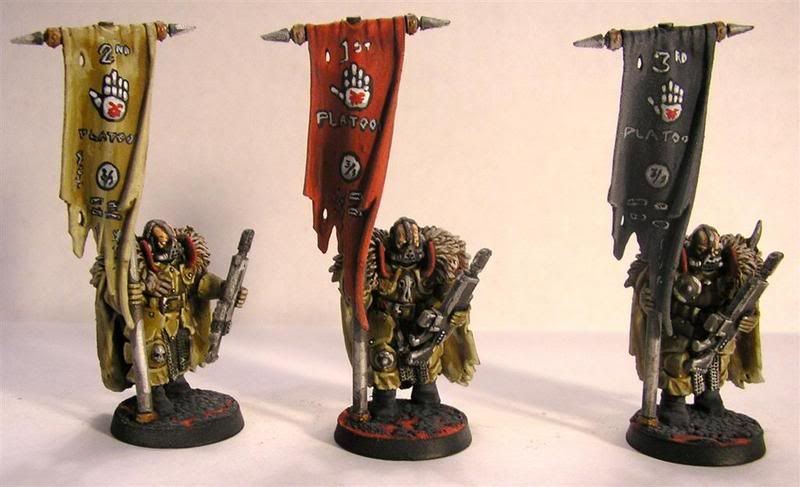
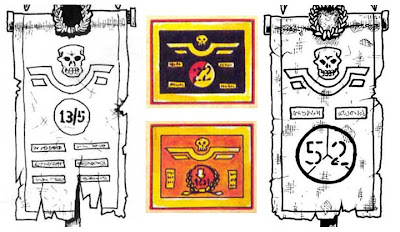
 The inspiration for these banners were taken from RonSaikowski's Banner Project: Imperial Guard, from From the Warp. Specifically the one below on the left:
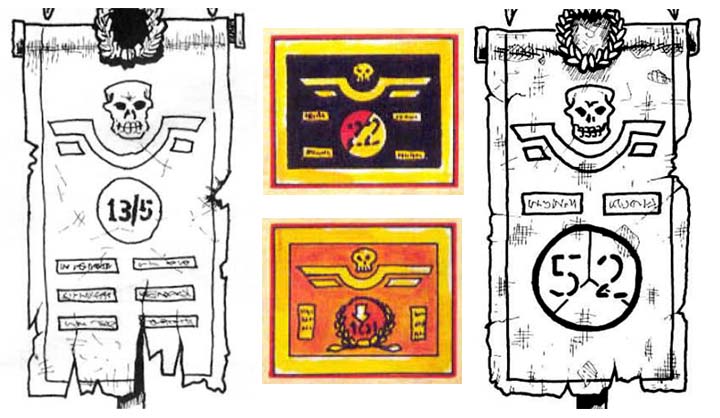 The circled "3/1" on my banners denoted that they belong to the Sons of Sek 3rd, 1st Company. Nothing too complex with these banners, since they're essentially the normal Chaos warriors banners.
So that's all for now. 21 models done, 148 to go. I'm currently 2 days behind on my schedule, which is better because I was almost a full week behind last week. However I have to finish up the remnants for the Easterlings and Anthony's Uruk-Hai for the GT this weekend. So I imagine that I will start next week behind again. Oh well, can't be helped.
Read more!



 Posts
Posts


 I usually start by grabbing a bunch of bases at once. I then rip off a large section of the wallpaper. I'm not concerned about conserving it, because I haven't even come close to making a dent in it after some 300+ bases plus a large display board.
 Kind of hard to tell from this picture, but you just want a bit of superglue in the center of the base. I tried different methods, most notable where I would even spread a very thin layer of glue over the surface of the base. But now I just put it in the center. It takes a little to figure out the right amount. Not the end of the world if you use to much, but don't let it happen too often.
 You then place the wallpaper upside down and press the base down firmly. Check to see how much glue seeps out the sides. If there's a lot then you're applying too much (makes it difficult to cut the paper). Ideally you want to see just a little bit of moisture at the edges. If there's not enough then the edges will stick up, which you have to go back and glue later.
 After they've had 10-15 minutes to dry I start by cutting them in separate, manageable pieces using a scissor. Next I cut them out, trying to get the edge of the wallpaper as flush to the edge of the base as possible. I used to use an exacto, but have been happier with a pair of sharp scissors with a thin blade.
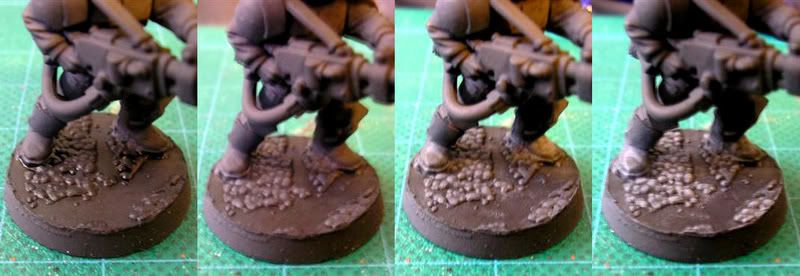 Step 1: Over a black base do a heavy drybrush of German Grey (GG is a vallejo paint, I highly reccommend getting it and the other Vallejo colors I reccommend here - alternatively mix 1:1 - Chaos Black:Codex Grey).
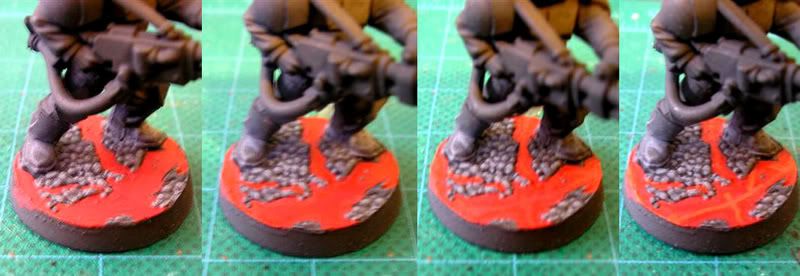 Well this is up to you, depending on what effect you want. For the Sons of Sek, they have red bases because the worship Khorne (blood for the blood god, and whatnot).